How to Propagate Plants at Home Complete Guide: Botany, Care,…

Editorial Disclaimer: This article is for informational and educational purposes only. It is not a substitute for professional medical advice, diagnosis, or treatment. Always consult a qualified healthcare provider or certified herbalist before using any plant for medicinal purposes, especially if you are pregnant, nursing, taking medication, or have a medical condition.
How to Propagate Plants at Home: Your Complete Guide to Stem Cuttings, Division, Layering & Water Propagation
Welcome to the ultimate guide on how to propagate plants at home, a rewarding and cost-effective way to expand your plant collection, share with friends, and even revive struggling specimens. Whether you're a seasoned gardener or just starting your green journey, understanding various plant propagation methods will empower you to create new life from existing plants. At Flora Medical Global, we believe in the power of plants, and learning to propagate them is a fundamental step in deepening your connection with the botanical world.
Plant propagation is essentially the process of creating new plants from a variety of sources: seeds, cuttings, or other plant parts. It’s a fascinating blend of art and science, allowing you to replicate your favorite plants and ensure their legacy. This comprehensive guide will walk you through the most effective and popular techniques, offering practical advice and expert tips to ensure your success.
01Why Learn How to Propagate Plants at Home?
- Expand Your Collection: Easily multiply your favorite plants for free.
- Share with Friends: Give the gift of greenery.
- Save Money: No need to buy new plants when you can grow your own.
- Preserve Varieties: Keep rare or sentimental plants going.
- Rejuvenate Plants: Propagate from leggy or overgrown plants to create fresh, new specimens.
- Educational & Rewarding: A hands-on way to learn about plant biology and experience the joy of nurture.
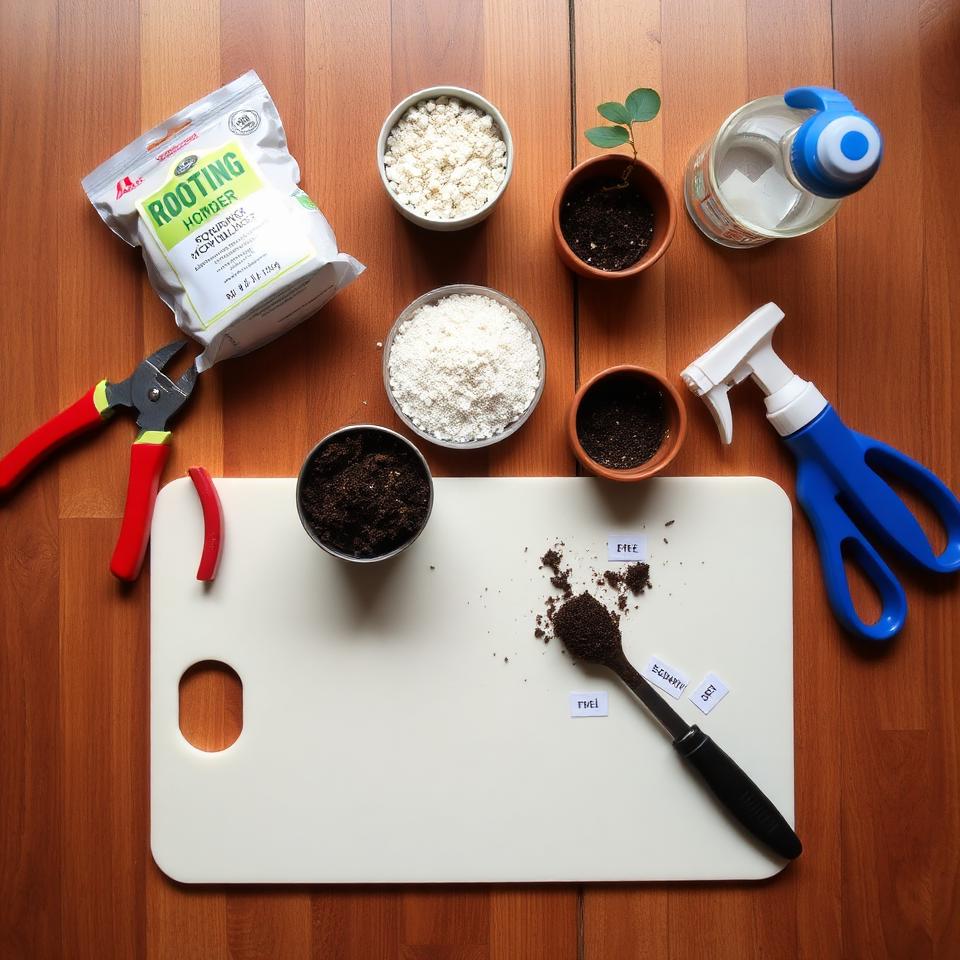
02Essential Tools for Successful Plant Propagation
Before diving into specific plant propagation methods, gather a few essential tools. Having these on hand will make your propagation journey smoother and more successful:
- Sharp Pruning Shears or Scissors: Essential for clean cuts, minimizing damage to the parent plant and the cutting.
- Sterilizing Alcohol or Bleach Solution: To clean your tools between cuts and prevent disease transmission.
- Potting Mix: A well-draining, sterile mix suitable for seedlings and cuttings.
- Pots or Trays: Small pots, seed trays, or even repurposed containers with drainage holes.
- Rooting Hormone: A natural or synthetic hormone that encourages root development, highly recommended for many types of cuttings. Learn more in our rooting hormone guide.
- Clear Plastic Domes or Bags: To create a mini-greenhouse effect, maintaining humidity.
- Mister Bottle: For misting cuttings to keep them hydrated.
- Gloves: To protect your hands, especially when handling certain plants or rooting hormones.
03Method 1: Stem Cutting Propagation – The Most Popular Way to Propagate Plants at Home
Stem cutting propagation is arguably the most common and versatile method for how to propagate plants at home. It involves taking a section of a plant's stem and encouraging it to grow new roots and shoots. This method is excellent for many popular houseplants and garden favorites, including Monstera, Pothos, Philodendron, and many herbs.
Types of Stem Cuttings:
- Softwood Cuttings: Taken from new, soft, flexible growth. Best for herbaceous plants and some shrubs in spring or early summer. Examples: Pothos, Basil, Coleus.
- Semi-Hardwood Cuttings: Taken from partially matured wood, often from the current season's growth. Best for many shrubs and some woody houseplants in summer or early autumn. Examples: Hydrangea, Azalea, Rosemary.
- Hardwood Cuttings: Taken from dormant, mature, woody stems. Best for deciduous shrubs and trees in late autumn or winter. Examples: Roses, Grapes, Dogwood.
- Herbaceous Cuttings: Non-woody stems from plants like succulents or annuals. Examples: Geraniums, Impatiens, most succulents.
Step-by-Step Guide to Stem Cutting Propagation:
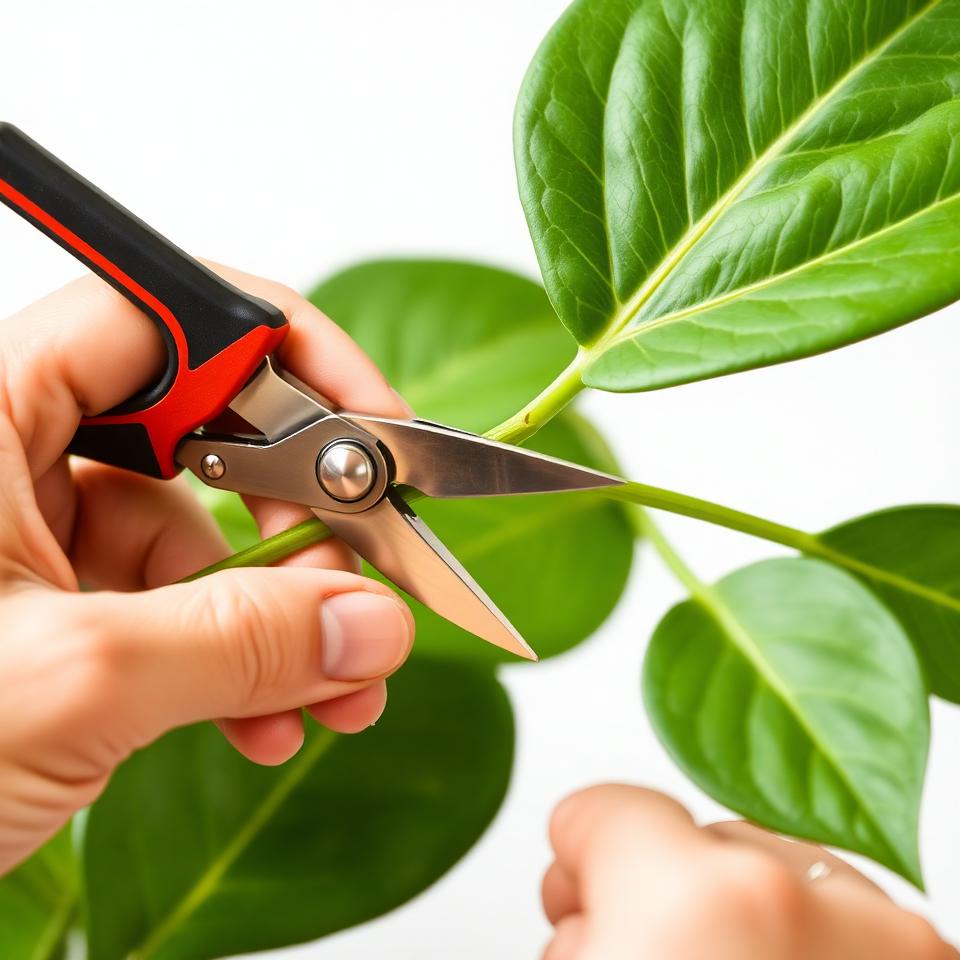
- Select a Healthy Stem: Choose a vigorous, disease-free stem from the parent plant. Aim for a stem with at least 2-3 nodes (the points where leaves or branches emerge).
- Make a Clean Cut: Using sharp, sterilized shears, cut just below a node. The cutting should generally be 4-6 inches long.
- Prepare the Cutting: Remove any leaves from the bottom 1-2 nodes to prevent rot and expose the rooting area. If the remaining leaves are large, you can cut them in half to reduce moisture loss.
- Apply Rooting Hormone (Optional but Recommended): Dip the cut end of the stem into rooting hormone powder or gel. Gently tap off any excess. This significantly increases your success rate, especially for plants that are harder to root. Our rooting hormone guide below provides more details.
- Plant the Cutting:
- In Soil: Create a small hole in a pre-moistened, well-draining potting mix. Insert the cutting, ensuring at least one node is buried. Gently firm the soil around the cutting.
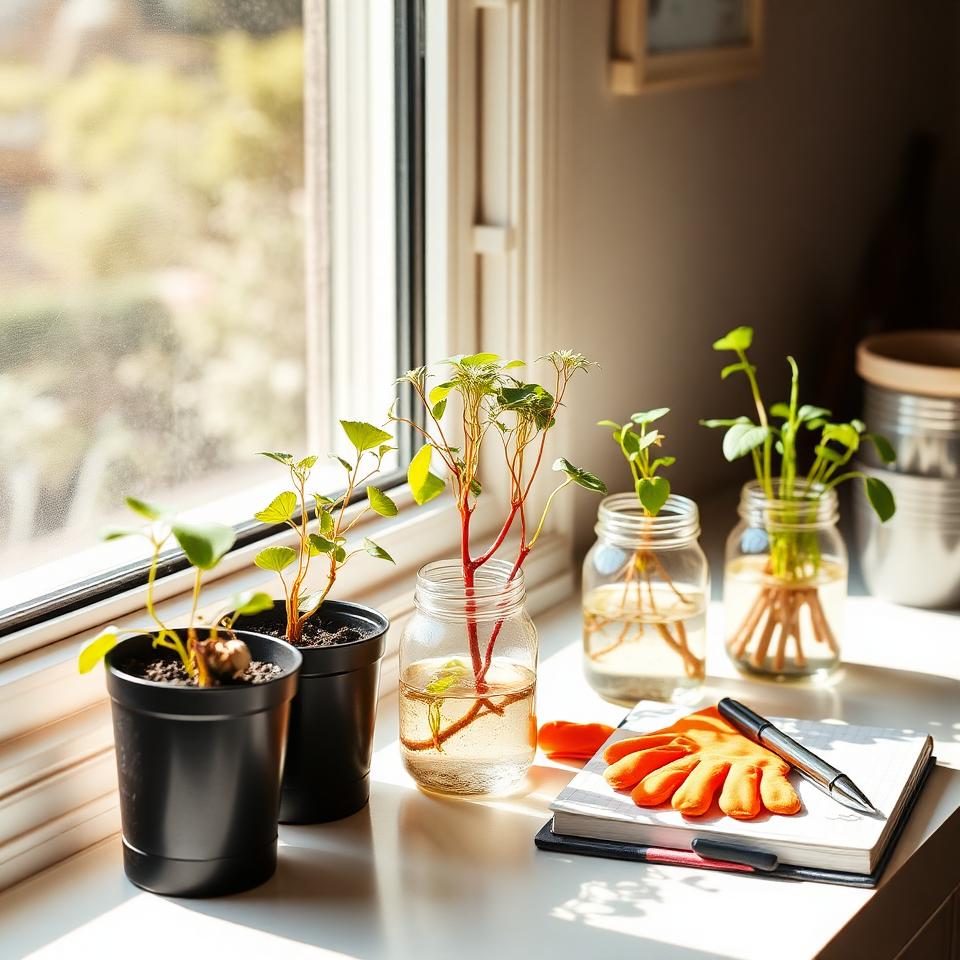
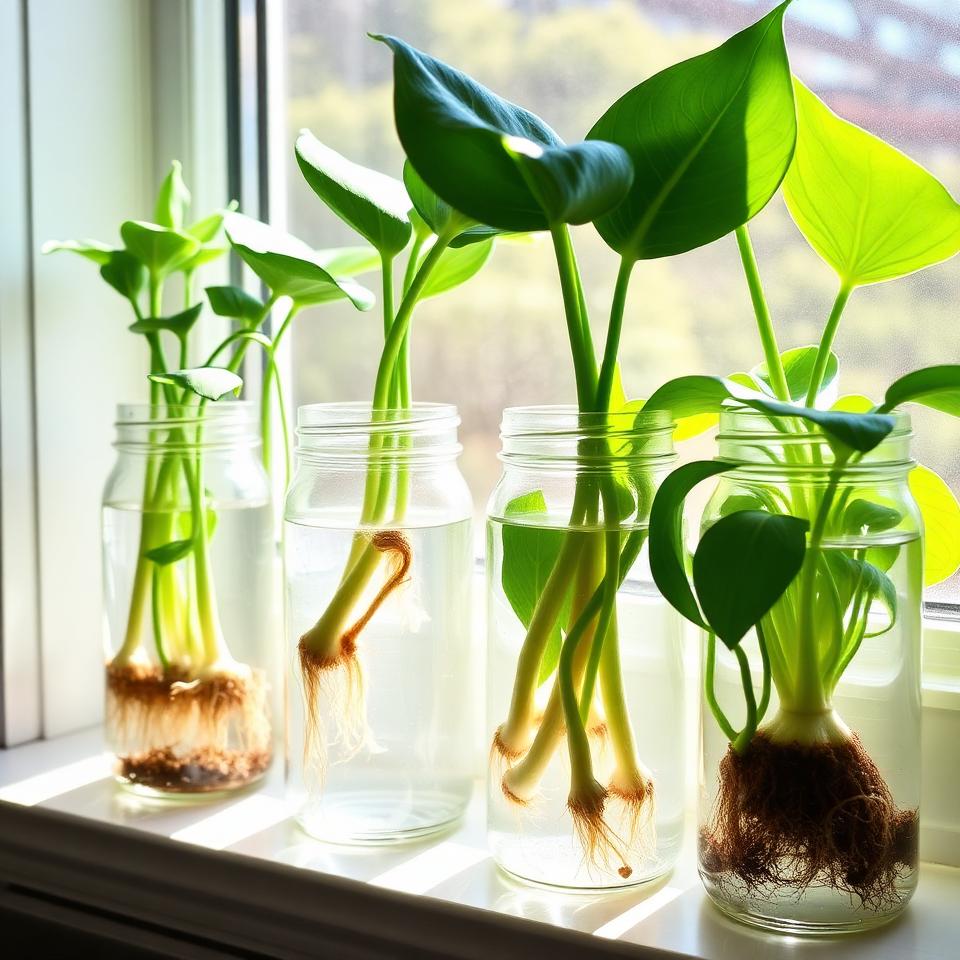
- In Water: Place the cutting in a clear glass or jar filled with clean water, ensuring at least one node is submerged but no leaves are in the water. This is a popular and visually appealing water propagation guide method for plants like Pothos and Monstera.
- Provide Ideal Conditions: Place cuttings in a warm spot with bright, indirect light. Maintain high humidity, either by misting regularly, covering with a plastic dome/bag, or using a humidity tray.
- Monitor and Care: Keep the soil consistently moist but not waterlogged (for soil cuttings) or change the water every few days (for water cuttings). Roots typically appear within a few weeks to a few months, depending on the plant.
- Transplant: Once roots are 1-2 inches long for water cuttings, or when soil cuttings show new growth and resistance when gently tugged, they are ready to be potted into their own containers.
Propagate Monstera and propagate Pothos using stem cuttings. These are incredibly popular indoor plants that root readily in water or soil, making them perfect for beginners learning how to propagate plants at home.
04Method 2: Water Propagation Guide – Simple & Visually Rewarding
The water propagation guide method is a fantastic entry point for beginners because it allows you to observe root development directly. While not suitable for all plants, it's highly effective for many common indoor plants.
Plants That Love Water Propagation:
- Pothos (Epipremnum aureum)
- Monstera (Monstera deliciosa and others)
- Philodendron
- Tradescantia (Wandering Jew)
- Impatiens
- Coleus
- Some herbs like mint, basil, and rosemary
Steps for Water Propagation:
- Take Cuttings: Follow steps 1-3 from the Stem Cutting Propagation guide.
- Submerge in Water: Place the prepared cuttings in a clean glass or jar filled with dechlorinated water (tap water left out for 24 hours). Ensure at least one node is submerged and no leaves are sitting in the water, as this can lead to rot.
- Provide Light: Place the container in a spot with bright, indirect light.
- Change Water Regularly: Replace the water every 3-5 days to replenish oxygen and prevent bacterial growth. You might notice the water becoming cloudy; this is natural but a sign it needs changing.
- Wait for Roots: Roots will typically emerge from the nodes submerged in water. This can take anywhere from a few days to several weeks.
- Transition to Soil: Once roots are 1-2 inches long, they can be carefully transplanted into a well-draining potting mix. It's crucial to make this transition gently, as water roots are more fragile than soil-grown roots. Keep the soil consistently moist for the first few weeks to ease the plant's adjustment.
05Method 3: Plant Division Technique – For Clump-Forming Plants
The plant division technique is an excellent method for how to propagate plants at home, particularly for herbaceous perennials, clumping houseplants, and some ornamental grasses. It involves physically separating a mature plant into two or more smaller plants, each with its own root system and shoots. This not only propagates the plant but also helps to rejuvenate an overgrown parent plant.
Explore Our Platforms
Plants Suitable for Division:
- Hostas
- Ferns (e.g., Boston Fern, Maidenhair Fern)
- Daylilies
- Irises
- Most clumping grasses
- Spider Plants (Chlorophytum comosum) – also propagate via plantlets
- Peace Lilies (Spathiphyllum)
- Many succulent varieties (e.g., Sansevieria)
Steps for Plant Division:
- Timing is Key: The best time to divide most plants is in spring, just as new growth begins, or in early autumn, after flowering.
- Prepare the Plant: Water the plant thoroughly a day before division to hydrate it.
- Remove from Pot/Ground: Gently dig up the plant from the garden bed or carefully remove it from its pot, trying to keep the root ball intact as much as possible.
- Clean the Roots: Gently shake off excess soil or use a gentle spray of water to reveal the root system.
- Divide the Plant:
- By Hand: For plants with loose rhizomes or fibrous roots (like Hostas, Daylilies), you can often gently pull apart sections by hand, ensuring each section has roots and some foliage.
- With Tools: For densely matted root balls (like some ornamental grasses or tough ferns), you may need a sharp knife, spade, or even two garden forks back-to-back to pry the sections apart. Ensure each division has a healthy clump of roots and at least one growing point.
- Replant Divisions: Immediately replant the divisions into prepared soil (either in the garden or in pots). Plant them at the same depth they were previously growing.
- Water and Care: Water the newly planted divisions thoroughly. Keep them well-watered for the first few weeks as they establish. Provide some initial shade if dividing during hot weather.
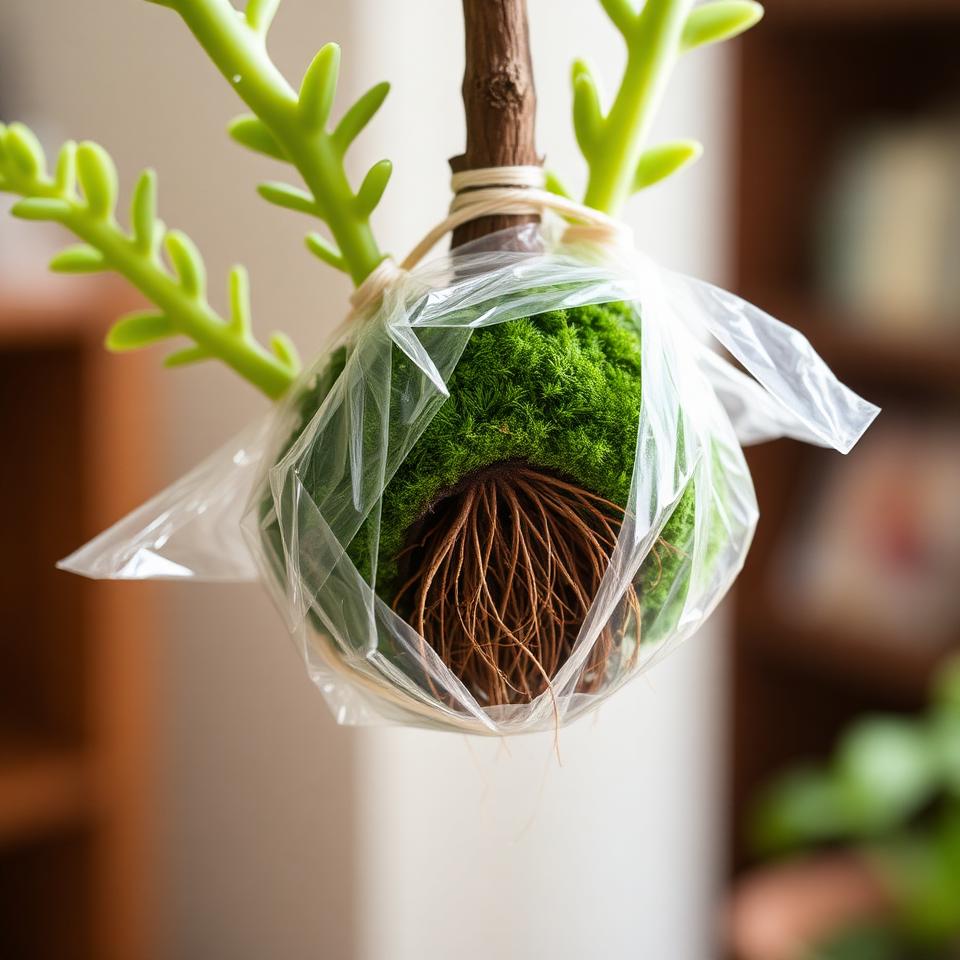
06Method 4: Air Layering Plants – For Woody Stems & Larger Plants
Air layering plants is an advanced but highly effective method for propagating larger, woody-stemmed plants that may be difficult to root from cuttings. It's also excellent for rejuvenating leggy indoor plants by creating a new, compact plant from the top section while the old base can resprout. This technique allows roots to form on a stem while it's still attached to the parent plant, ensuring it continues to receive nutrients and water.

Plants Suitable for Air Layering:
- Ficus (e.g., Fiddle Leaf Fig, Rubber Plant)
- Dracaena
- Croton
- Dieffenbachia
- Some fruit trees and shrubs (e.g., magnolias, rhododendrons)
- Monstera (especially when it has aerial roots)
Steps for Air Layering Plants:
- Select a Stem: Choose a healthy, mature stem about 1/4 to 1/2 inch in diameter. Select an area where you want new roots to form, typically 6-12 inches below the tip of the stem.
- Prepare the Bark:
- For Woody Stems: Use a sharp, sterilized knife to make two parallel cuts about 1 inch apart around the circumference of the stem. Carefully remove the ring of bark between these two cuts, exposing the green cambium layer underneath. Gently scrape the cambium layer to ensure no vascular tissue remains.
- For Herbaceous Stems (or easier method): Make a small, upward diagonal cut about one-third of the way through the stem. Insert a small toothpick or a piece of a matchstick to keep the cut open.
- Apply Rooting Hormone: Dust or paint rooting hormone (gel is easiest here) around the exposed wound.
- Wrap the Wound: Moisten sphagnum moss and gently squeeze out excess water. Pack a handful of this moss around the wounded area, ensuring it completely covers the exposed section.
- Secure with Plastic: Wrap the moss tightly with a clear plastic sheet (like cling film or a plastic bag), securing both ends with twist ties, electrical tape, or string. Ensure it’s airtight to retain moisture.
- Wait for Roots: Place the air layer in a warm spot with bright, indirect light. Monitor the moss; if it starts to dry out, you might need to re-moisten it (you can sometimes inject water with a syringe). Roots should become visible through the plastic within 1-3 months, depending on the plant.
- Sever and Pot: Once a good network of roots has formed (filling a significant portion of the moss ball), cut the stem just below the new root ball. Carefully remove the plastic, being gentle with the new roots. Plant the rooted section into a pot with suitable potting mix.
- Aftercare: Water thoroughly and keep the newly potted plant in a humid environment and bright, indirect light for a few weeks to allow it to acclimate to its new independent life.
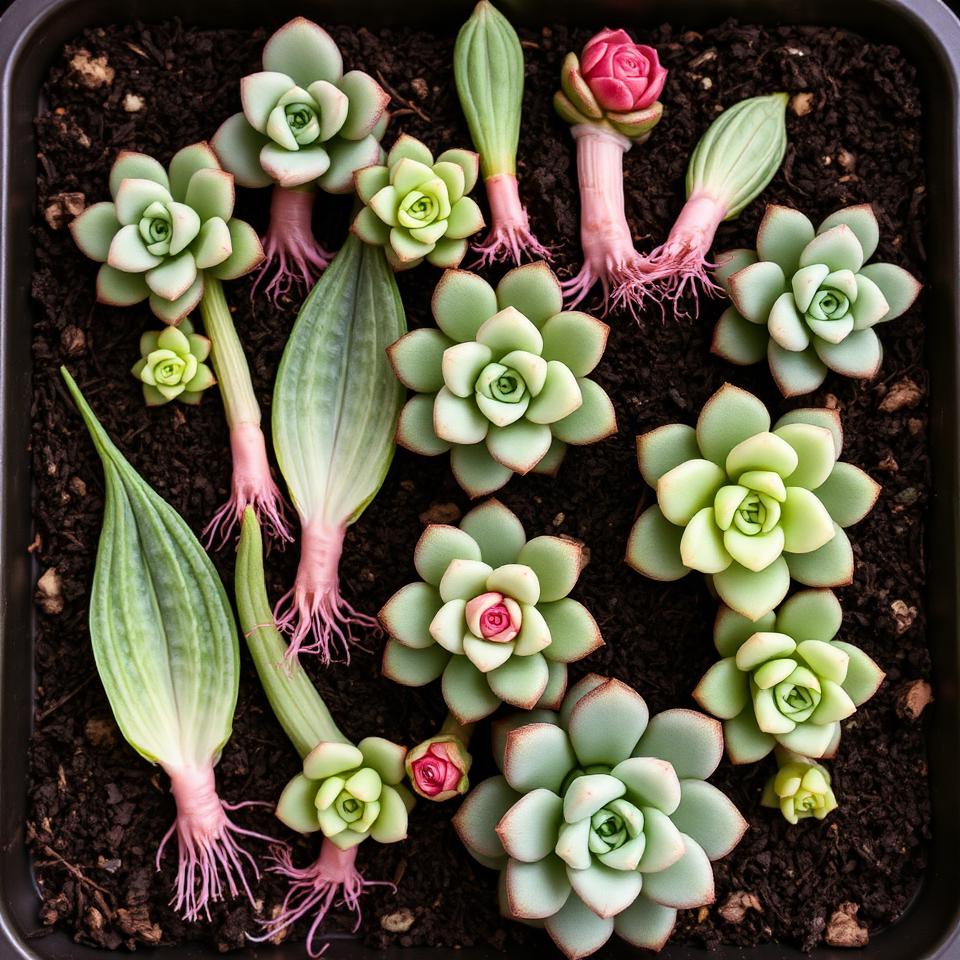
07Method 5: Propagating Succulents – Easy & Rewarding
Propagating succulents is exceptionally easy and highly rewarding, often yielding many new plants from just a few leaves or cuttings. Their ability to store water makes them resilient propagators.
Methods for Propagating Succulents:
- Leaf Cuttings:
- Gently twist or cut a healthy, plump leaf from the parent plant, ensuring the entire leaf (including the base) is intact.
- Allow the leaves to 'callus' (form a dry scab over the wound) for 2-7 days in a dry, shaded area. This prevents rot.
- Place callused leaves on top of well-draining succulent potting mix. Do not bury them.
- Mist the soil lightly every few days or when dry. Roots and tiny plantlets will eventually emerge from the base of the leaf.
- Once the new plantlet is established and the original leaf shrivels, it can be gently separated and potted.
- Stem Cuttings:
- Cut a section of a healthy stem, typically with 2-3 leaves attached.
- Remove the bottom leaves and allow the cutting to callus for 2-7 days.
- Insert the callused stem into well-draining succulent potting mix.
- Water sparingly until roots establish (usually 2-4 weeks), then resume normal succulent watering.
- Offsets/Pups: Many succulents produce 'pups' or offsets at their base or on flower stalks. Simply gently twist or cut these off, allow them to callus (if necessary), and plant them.
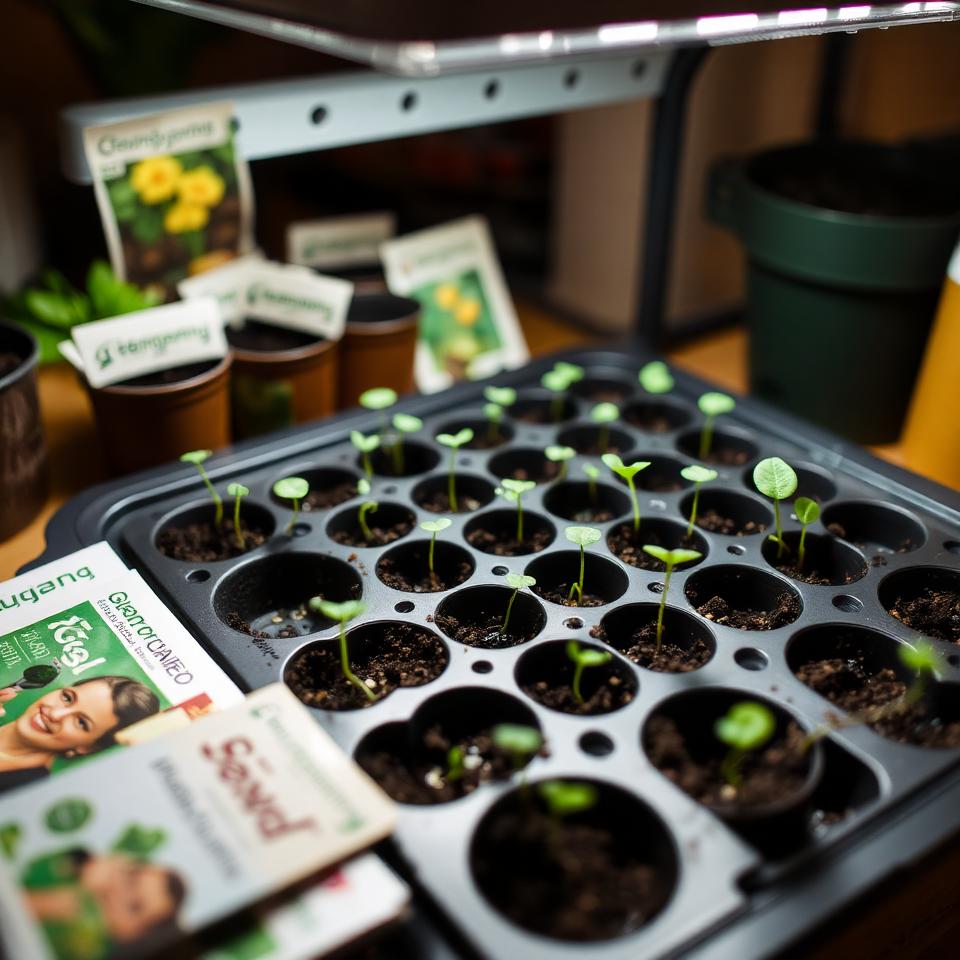
08Method 6: Seed Starting Guide – Propagating from Scratch
While not strictly 'cloning' like other methods, our seed starting guide is fundamental to how to propagate plants at home and grow a vast array of species. Starting plants from seed is economical and offers access to a wider variety of plants. For more general gardening advice, visit our gardening section.
Steps for Seed Starting:
- Choose Quality Seeds: Purchase fresh seeds from reputable sources or save your own.
- Prepare Seed: Starting Mix: Use a sterile, fine-textured seed-starting mix, not regular potting soil. Moisten it thoroughly.
- Sow Seeds: Refer to seed packet instructions for planting depth and spacing. Generally, small seeds are lightly pressed onto the surface, while larger seeds are buried two to three times their diameter.
- Provide Humidity: Cover trays with a clear dome or plastic wrap to maintain high humidity.
- Ensure Warmth & Light: Many seeds require warmth to germinate. Use a heat mat if necessary. Provide bright, indirect light immediately upon germination to prevent leggy seedlings.
- Thin Seedlings: Once seedlings have a few sets of true leaves, thin them to the recommended spacing to avoid overcrowding.
- Harden Off: Before transplanting outdoors, gradually acclimate seedlings to outdoor conditions over 7-14 days.
- Transplant: Plant hardened-off seedlings into their final outdoor location or larger pots.
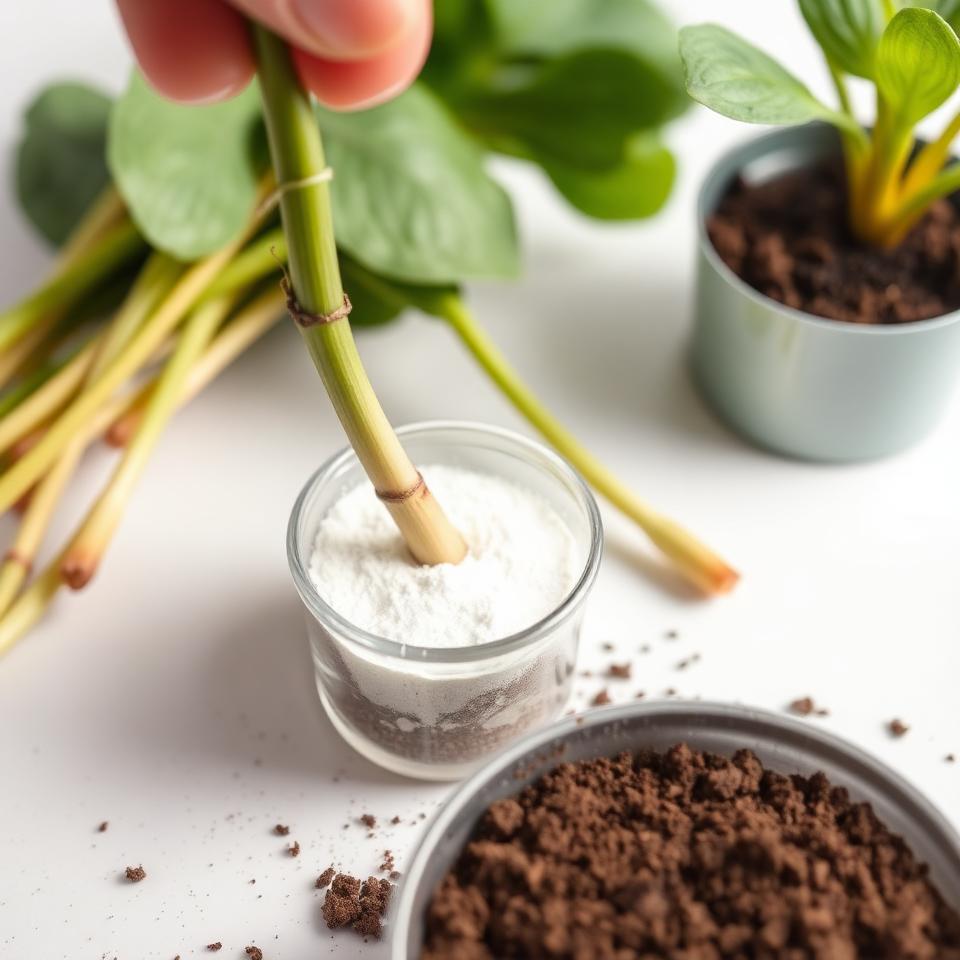
09Rooting Hormone Guide – Boosting Your Success Rates
A rooting hormone guide is essential for anyone serious about plant cloning at home. Rooting hormones, typically containing auxins like IBA (indole-3-butyric acid) or NAA (1-naphthaleneacetic acid), stimulate cell division and root formation at the cut end of a stem. While not always strictly necessary, they significantly improve the success rate, especially for difficult-to-root plants.
Types of Rooting Hormones:
- Powder: The most common form. Dip the cutting into the powder, tap off excess.
- Liquid: Dilute concentrate or ready-to-use solutions. Cuttings can be dipped or soaked.
- Gel: Adheres well to the cutting, forming a protective seal. Excellent for delicate cuttings.
How to Use Rooting Hormone:
- Take your sterile cutting.
- Moisten the cut end if using powder hormone (this helps the powder stick).
- Dip the bottom 1/2 to 1 inch of the cutting into the hormone.
- Tap off any excess. Too much hormone can inhibit rooting.
- Plant the cutting immediately according to your chosen method (soil or water if specified for water, though typically hormones are for soil/medium).
Always follow manufacturer instructions for specific concentrations and application methods.
10General Tips for Success When You Propagate Plants at Home
- Sterilize Your Tools: Always clean your pruning shears or knives with rubbing alcohol or a bleach solution before and between each plant to prevent the spread of diseases.
- Choose Healthy Parent Plants: Cuttings from vigorous, pest-free plants have a higher chance of rooting.
- Proper Timing: The best time to propagate depends on the plant and method. Generally, spring and early summer are ideal when plants are actively growing.
- Provide Warmth: A warm environment (70-75°F / 21-24°C) often speeds up root development.
- Maintain Humidity: Most cuttings, especially those rooting in soil, benefit from high humidity. Use a clear plastic bag or dome.
- Bright, Indirect Light: Cuttings need light for photosynthesis but direct sun can be too intense and dry them out.
- Patience is Key: Rooting takes time. Don't constantly pull up cuttings to check for roots, as this can damage fledgling root systems.
- Label Everything: Especially if propagating multiple types of plants, clear labels will save you confusion later.
11Conclusion: Mastering Plant Cloning at Home
Learning how to propagate plants at home is a deeply satisfying aspect of gardening. From simple water propagation guide techniques to more intricate air layering plants, each method offers a unique opportunity to multiply your favorite flora. By utilizing plant propagation methods like stem cutting propagation and understanding the role of a rooting hormone guide, you can confidently engage in plant cloning at home. Whether you're aiming to propagate Monstera, propagate Pothos, or delve into a comprehensive seed starting guide, the world of plant reproduction is now at your fingertips. Embrace the journey, and watch your garden flourish!
12Common Questions About How to Propagate Plants at Home
What is plant propagation, and what are its main benefits for home gardeners?
Plant propagation is the process of creating new plants from existing ones, essentially multiplying your green companions. It allows you to expand your collection for free, share plants with friends, and even preserve genetics from a favorite specimen. Beyond the cost savings, it's a deeply satisfying way to connect with the plant life cycle and nurture new growth.
What's the difference between softwood, semi-hardwood, and hardwood cuttings?
These terms refer to the maturity of the stem tissue used for cuttings. Softwood cuttings are taken from new, flexible growth, semi-hardwood from partially mature stems, and hardwood from dormant, woody growth. Each type suits different plant species and typically has an optimal time for collection to ensure successful rooting.
Can all plants be propagated in water, and what are the pros and cons of this method?
While many common houseplants root well in water, not all plants are suitable for this method; some prefer soil directly. Water propagation offers a clear view of root development and is often simpler for beginners. However, roots formed in water can be fragile and may struggle to adapt when transplanted into soil, sometimes leading to transplant shock.
How do I know if my plant is ready for division, and what's the general process?
Your plant is likely ready for division when it becomes root-bound, produces multiple shoots, or shows reduced vigor in its center. To divide, carefully remove the plant from its pot, gently tease apart the root ball into smaller sections, ensuring each section has roots and foliage. Replant the divisions into fresh potting mix.
What exactly is air layering, and when should I consider using it over stem cuttings?
Air layering is a propagation technique where roots are encouraged to form on a stem while it's still attached to the parent plant. You make an incision, apply rooting hormone, and wrap the area in moist sphagnum moss and plastic. It's ideal for larger, woody plants or those difficult to root from cuttings, as the new plant benefits from the parent's support until well-rooted.
Why might my propagation attempts fail, and how can I improve my success rate?
Common reasons for failure include using unhealthy parent material, incorrect cutting technique, insufficient humidity, overwatering leading to rot, or planting in unsuitable media. To improve success, ensure sharp, sterile tools, provide consistent moisture and warmth, use appropriate rooting hormone, and select the right propagation method for your plant species.
How do I care for my newly propagated plants once they've rooted and are growing?
Once your new plants have established a good root system, gradually acclimate them to less humid conditions if they were under a dome or bag. Provide them with bright, indirect light and water consistently, but avoid overwatering. Fertilize sparingly as they are still young and sensitive, focusing on gentle, diluted feeds.
Is rooting hormone always necessary, or can plants root successfully without it?
Rooting hormone isn't always strictly necessary, as many plants can root naturally, especially easy-to-propagate varieties like Pothos or Philodendron. However, it significantly increases the success rate and speeds up root development for more challenging plants or woody cuttings. It contains auxins that stimulate root cell growth, giving your cuttings a better start.
Is there a best time of year to propagate plants, or can I do it anytime?
While many plants can be propagated year-round indoors, the ideal time is often during the plant's active growing season, typically spring or early summer. At this time, plants have more energy for growth and root development, and environmental conditions like warmth and light are generally more favorable. Avoid propagating dormant or stressed plants.
What are the essential tools for plant propagation, and why is cleanliness important?
Essential tools include sharp, clean pruning shears or a knife, rooting hormone (optional), suitable propagation medium (soil, perlite, water), and sometimes humidity domes or plastic bags. Cleanliness is paramount to prevent the spread of diseases and pests. Sterilizing your tools before and between cuts minimizes the risk of introducing pathogens to your vulnerable cuttings.
13How to Propagate Plants at Home: References & Further Reading
Authoritative sources and related guides:

- Wikipedia — background reference
- PubMed — peer-reviewed studies
- Kew POWO — botanical reference
- NCBI PMC — open-access research
- WHO — global health authority
Related on Flora Medical Global
Reviewed by the Flora Medical Global Botanical Review Panel
Multi-disciplinary editorial group · Botany · Ethnobotany · Herbal-medicine literature
Who reviewed this: This page was checked by the Flora Medical Global Botanical Review Panel — an in-house editorial group of botany graduates, ethnobotany researchers, and horticulture practitioners who collectively maintain our 7,000+ plant encyclopedia. Meet the team.
Our 4-step verification process
1. Taxonomic verification
Scientific names and synonyms cross-checked against Kew POWO, World Flora Online, and The Plant List.
2. Phytochemical & medicinal cross-reference
Active compounds, traditional uses, and reported activities are cross-referenced with PubMed, USDA Dr. Duke's database, and peer-reviewed ethnobotanical literature.
3. Conservation & distribution check
Distribution, ecology, and conservation status confirmed against GBIF occurrence records and the IUCN Red List.
4. Editorial & safety review
Every entry passes an editorial pass for clarity, originality, and safety notices (toxicity, contraindications, dosage caveats) before publication.
Last reviewed:
Important medical disclaimer: This content is for educational and research purposes only. It is not medical advice and is not a substitute for consultation with a licensed healthcare provider. Do not use any herb to self-treat a medical condition without professional guidance.
Explore Our Platforms
Comments (0)
No comments yet. Be the first!